
Articles
Cosmo Tech provides a 360° Simulation Digital Twin platform to solve the most complex industrial problems and lead enterprise decision making. Industrial companies rely on Cosmo Tech to predict the evolution of their organization to better understand the impact of their decisions and optimize all levels of enterprise planning; ensuring a future that is robust, resilient and sustainable.
Azure Machine Learning studio is the web portal for data scientist developers in Azure Machine Learning. The studio combines no-code and code-first experiences for an inclusive data science platform. You can write and run your own code in managed Jupyter Notebook servers that are directly integrated in the studio, train and deploy machine learning models with Azure Machine Learning designer, create automated ML experiments with an easy-to-use interface, and use Azure Machine Learning data labeling to efficiently coordinate image labeling or text labeling projects (see What is Azure Machine Learning studio?)
In this article, you can learn how to combine these two powerful solutions together: setup Cosmo Tech development environment in Azure Machine Learning studio. Then you will be able to create and launch Cosmo Tech simulations and analyze simulation results in Azure Machine Learning studio.
You need to have access to Azure Machine Learning service, you can find related information on the Microsoft official website here: Azure Machine Learning Product Overview
Choose your Machine Learning resource from Microsoft Azure portal, then click “Launch studio”

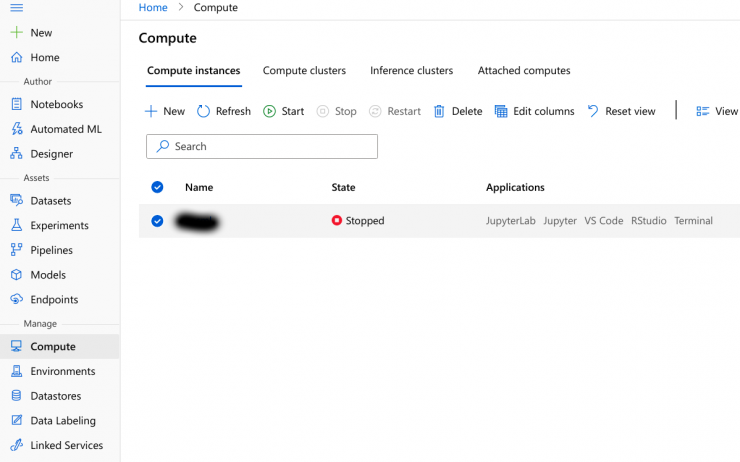
In the left menu, click Mange>Compute, then start your compute instance
Create a file cosmotech.yml with following contents:
name: cosmotech_automl
dependencies:
# The python interpreter version.
# Currently Azure ML only supports 3.5.2 and later.
– pip==21.1.2
– python==3.6.6
– nb_conda
– boto3==1.15.18
– matplotlib==2.1.0
– numpy==1.18.5
– cython
– urllib3<1.24
– scipy>=1.4.1,<=1.5.2
– scikit-learn==0.22.1
– pandas==0.25.1
– py-xgboost<=0.90
– conda-forge::fbprophet==0.5
– holidays==0.9.11
– pytorch::pytorch=1.4.0
– cudatoolkit=10.1.243
– tornado==6.1.0– pip:
# Required packages for AzureML execution, history, and data preparation.
– azureml-widgets~=1.34.0
– pytorch-transformers==1.0.0
– spacy==2.1.8
– https://aka.ms/automl-resources/packages/en_core_web_sm-2.1.0.tar.gz
– -r https://automlresources-prod.azureedge.net/validated-requirements/1.34.0/validated_linux_requirements.txt [–no-deps]
– arch==4.14# Required packages for Cosmo Tech development environment
– cosmotech-api==1.0.1
– azure-kusto-data==2.0.0
– azure-kusto-ingest==2.0.0
In order to be up to date, you can also refer to the automl_env_linux.yml file in Azure Machine Learning github repository here
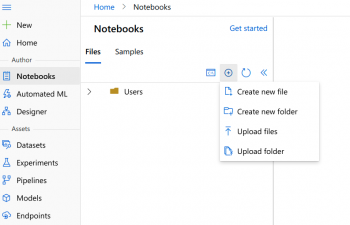
In Azure Machine Learning Studio, click ‘Notebooks’ then click plus button to upload the cosmotech.yml file we created in the Step 3.

Click ‘Open terminal’ to use Azure Machine Learning Terminal

Type following command to create a conda environment with our yml file:
conda env create -f cosmotech.yml
Activate new environment with following command:
conda activate cosmotech_automl
Use following command in the terminal to create a new Jupyter kernel:
python -m ipykernel install –user –name cosmotech_automl –display-name “Python 3.6 – Cosmotech”
To check if the new kernel has been created, click “Add files” button the choose “Create new file”:
Choose”Notebook(*.ipynb) ” as file type
Open this notebook file, in the right side you can choose kernel as “Python 3.6 – Cosmotech”

While customizing the compute instance, make sure you do not delete the azureml_py36 or azureml_py38 conda environments. Also do not delete Python 3.6 – AzureML or Python 3.8 – AzureML kernels. These are needed for Jupyter/JupyterLab functionality.
With Cosmo Tech development environment installed, you can try to launch simulations and analyze simulation results. We will explain more about Cosmo Tech Python API in the next article.